
Using thermal imaging is an effective way to spot hidden moisture under carpets. The camera detects temperature differences caused by water retention, revealing cooler spots where moisture is present. Make certain the area is dark, cool, and clear of obstructions to get the best results. Move the camera slowly and in overlapping passes for clear images. Want to learn how to optimize your inspection and interpret the results? Keep exploring for more tips.
Key Takeaways
- Thermal imaging detects cooler areas under carpets caused by moisture retention, highlighting potential hidden water intrusion.
- Ensure the area is dark and cool for optimal contrast when using a thermal camera to spot moisture.
- Move the camera steadily and take multiple overlapping images for accurate identification of moisture hotspots.
- Look for irregular dark patches or cooler spots in thermal images indicating possible hidden moisture beneath the carpet.
- Combine thermal imaging results with physical inspection and moisture meters for confirmation of concealed moisture.

HF96 Thermal Camera with Laser Pointer, Intelligent Scene Detection, Super Resolution 240 x 240, -4°F~1022°F, Thermal Imaging Camera 96 x 96 IR Resolution, 25 HZ Infrared Camera, 11h Runtime
【Intelligent Scene Recognition with IntellFault】HF96 features HSFTOOLS' unique IntellFault technology for automated scene detection. Powered by deep learning,…
As an affiliate, we earn on qualifying purchases.
As an affiliate, we earn on qualifying purchases.
Understanding How Thermal Imaging Detects Moisture

Have you ever wondered how thermal imaging cameras can detect hidden moisture? These cameras work by sensing temperature differences on surfaces. Moisture in materials affects how heat is transferred, creating temperature variations that are invisible to the naked eye. When moisture is present, it often cools the surrounding area because water absorbs heat more efficiently. The thermal camera detects these subtle temperature differences and displays them as different colors or shades on the image. This allows you to see areas where moisture is trapped beneath surfaces like carpets or walls. The process is quick and non-invasive, making it a valuable tool for identifying problem spots without needing to cut into walls or remove flooring. Additionally, Kia Tuning techniques and modifications can sometimes influence the thermal signatures of vehicles, which can be useful for diagnostic purposes.

General Tools MMD4E Digital Moisture Meter, Water Leak Detector, Moisture Tester, Pin Type, Backlit LCD Display With Audible and Visual High-Medium-Low Moisture Content Alerts, Grays
HUMIDITY SENSOR: Our handy meter tool can quickly determine what level of remediation is needed to keep your…
As an affiliate, we earn on qualifying purchases.
As an affiliate, we earn on qualifying purchases.
The Science Behind Thermal Cameras and Heat Signatures

Ever wonder how thermal cameras detect temperature differences from a distance? They work by sensing infrared radiation emitted by objects. All objects emit some heat, which varies based on their temperature. Thermal cameras contain sensors called microbolometers that detect these infrared signals. When an object is warmer or cooler than its surroundings, it creates a distinct heat signature. The camera captures these variations and translates them into an image called a thermogram. Warmer areas show up as bright or colored regions, while cooler areas appear darker. This process allows you to see temperature differences that are invisible to the naked eye. In the case of moisture detection, damp spots tend to retain heat longer, standing out against the drier, warmer surfaces. Additionally, the thermal imaging process can help identify heat retention patterns, which are useful in pinpointing hidden moisture or insulation issues.

TOPDON TC004 Mini Thermal Imaging Camera, 240 x 240 TISR Resolution, 15-Hour Battery Life, 128 x 128 IR Resolution, 25Hz Handheld Infrared Camera with High/Low Temp Alerts, Auto Shutdown- Blue
【Enhanced Thermal Clarity】Start with 128×128 thermal imaging and enhance to 240×240 resolution with TISR technology for greater details….
As an affiliate, we earn on qualifying purchases.
As an affiliate, we earn on qualifying purchases.
Common Signs of Hidden Moisture Beneath Carpets

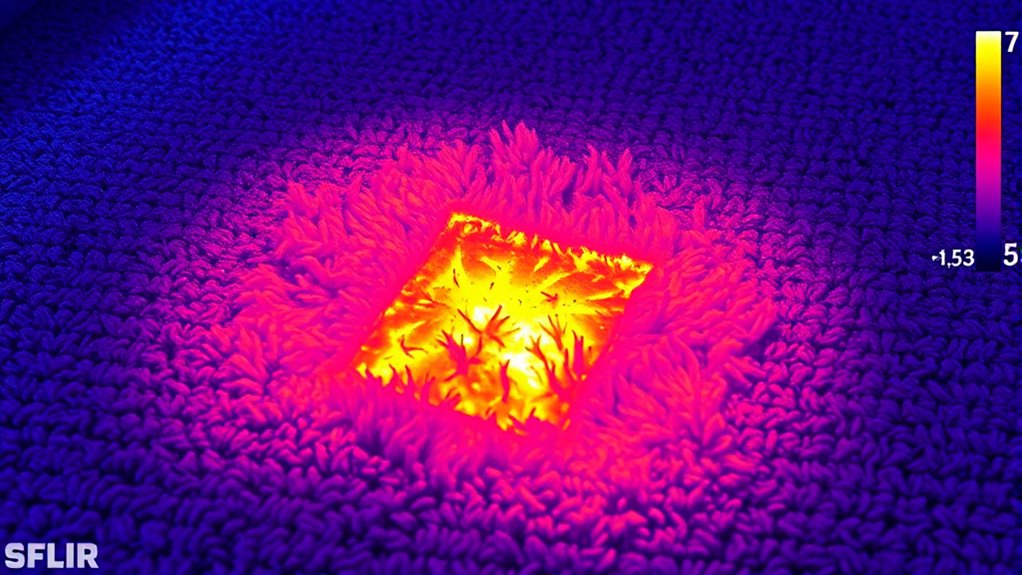
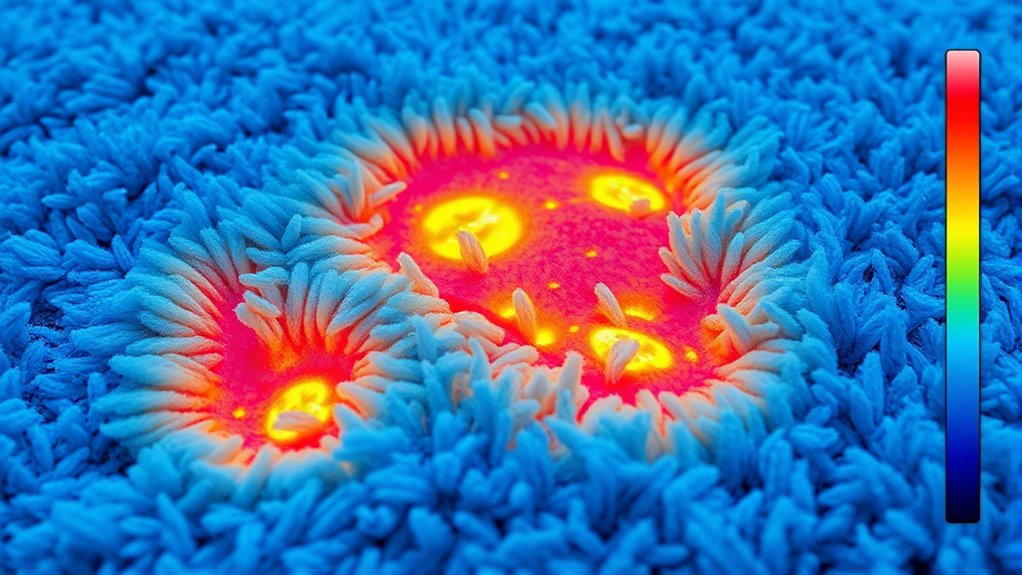
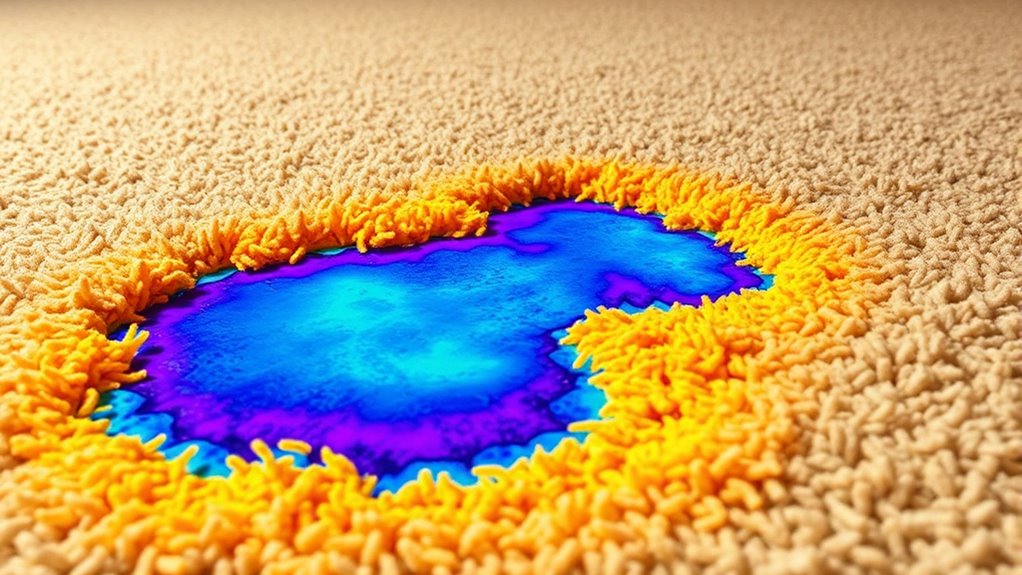
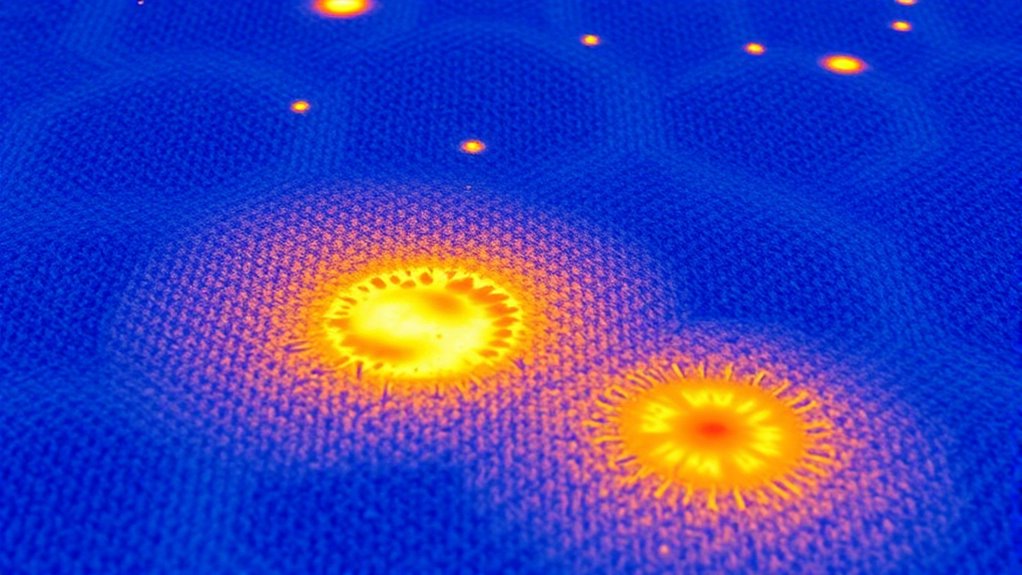
Hidden moisture beneath carpets often reveals itself through subtle signs that can be easily overlooked. You might notice a persistent musty odor or feel dampness when walking barefoot. Discoloration or staining on the carpet or the pad underneath can also indicate hidden moisture. Look for areas that feel softer or spongier than the surrounding carpet, which suggests water damage. Sometimes, you’ll see buckling or ripples, as moisture causes the carpet to warp. If the carpet feels unusually cold or clammy, it’s a sign of underlying dampness. These signs often appear gradually, so paying close attention can help you catch problems early before mold or extensive damage develops. Recognizing these clues is key to addressing moisture issues promptly. Additionally, using thermal imaging can help detect moisture that is invisible to the naked eye, providing a reliable method to identify hidden water intrusion.

FOXWELL RT280 Thermal Imaging Camera, 320 X 240 2.8" LCD Screen Thermal Camera, TISR Resolution 240 x 180, 25Hz Handheld Infrared Cameras with Laser, PC Analysis, Photo & Video Recording, 8GB
【Enhanced Thermal Clarity for Precise Inspections】The RT280 handheld thermal imaging camera features a 2.8-inch 320×240 LCD screen for…
As an affiliate, we earn on qualifying purchases.
As an affiliate, we earn on qualifying purchases.
Preparing Your Space for a Thermal Inspection
Before your thermal inspection, you should clear the area of clutter to guarantee accurate readings. Controlling environmental conditions, like temperature and humidity, helps prevent false or misleading results. Taking these steps makes sure the thermal imaging provides the most reliable information about your space.
Clear the Area
Have you prepared your space for a thermal inspection? Clearing the area ensures accurate results. Remove furniture, rugs, and obstructions that could block heat flow or hide moisture. This allows the thermal camera to scan evenly and identify hidden issues effectively. Also, turn off any devices that generate heat, like space heaters or fans, to prevent false readings. Keep the space tidy to avoid distractions or misinterpretation of thermal patterns. Consider using the following checklist:
| Item to Clear | Area Description | Notes |
|---|---|---|
| Furniture | Living room | Move away from walls |
| Rugs and Carpets | Floor surfaces | Remove for clear view |
| Electronic Devices | Power outlets | Turn off to prevent heat interference |
| Curtains/Blinds | Windows | Open or remove if blocking view |
| Personal Items | Shelves, counters | Store away for unobstructed scan |
Properly clearing your space optimizes thermal imaging accuracy. Additionally, ensuring proper heat flow within the space helps in accurately detecting moisture or cold spots.
Control Environmental Conditions
Controlling environmental conditions is essential to obtaining accurate thermal imaging results. You need to minimize temperature fluctuations and drafts that could distort thermal readings. Guarantee the space is at a stable temperature, ideally within a narrow range, to prevent heat transfer that masks moisture issues. Turn off HVAC systems and fans, as moving air can alter surface temperatures and create false positives or negatives. Keep windows and doors closed to maintain consistent conditions. If possible, conduct the inspection during times of minimal environmental change, such as early mornings or late evenings. Properly controlling these conditions allows the thermal camera to detect subtle temperature differences caused by moisture, ensuring your inspection yields reliable, actionable results. Additionally, understanding the importance of contrast ratio helps in interpreting thermal images more accurately, as higher contrast can make moisture-related temperature differences more distinguishable.
Step-by-Step Guide to Using Thermal Imaging for Moisture Detection
Using thermal imaging to detect moisture involves capturing infrared images that reveal temperature differences on surfaces. First, confirm the area is as dark and cool as possible to maximize thermal contrast. Turn on your thermal camera and hold it steadily above the carpet, keeping a consistent distance. Slowly scan the surface in overlapping passes, looking for cooler spots that indicate potential moisture. Avoid rushing—pausing briefly over suspicious areas helps clarify temperature variations. Keep the camera steady and maintain a steady hand for accurate readings. Take multiple images from different angles if needed. Record the images for later analysis, but don’t interpret them yet. This step helps you identify areas that might contain hidden moisture, guiding further inspection. Proper calibration of your thermal camera ensures more accurate and reliable results during moisture detection.
Interpreting Thermal Images to Identify Problem Areas
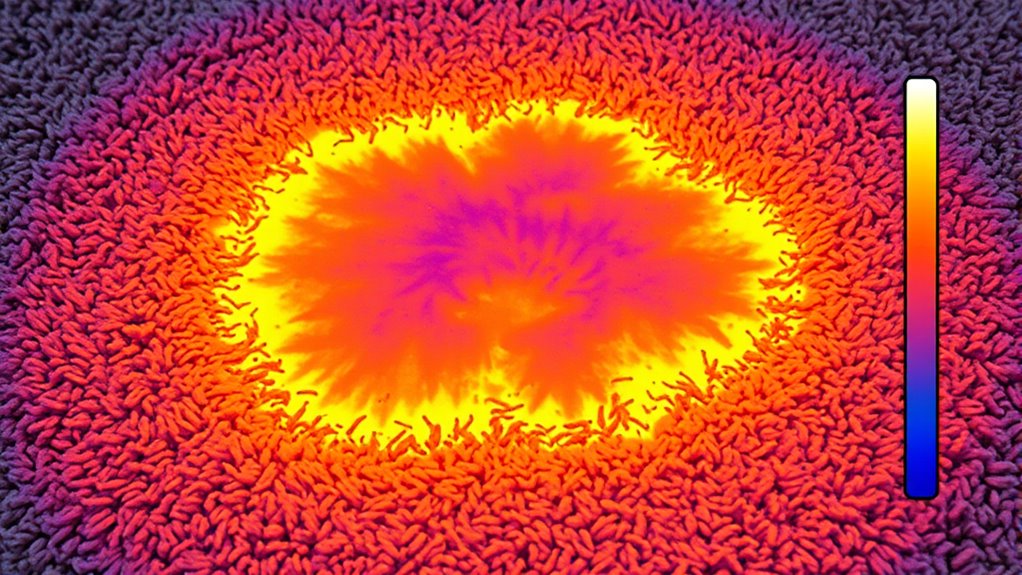
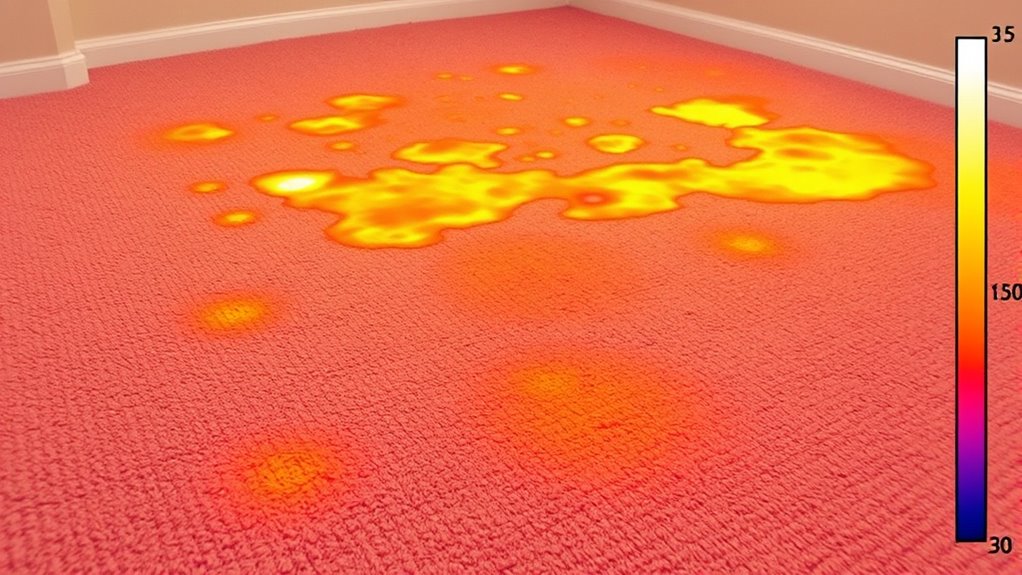
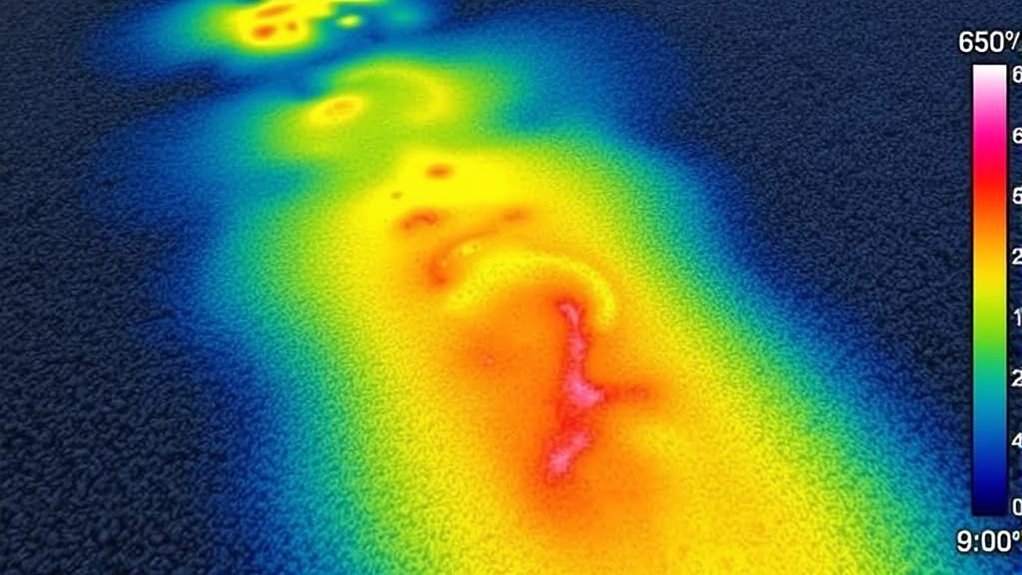
Once you’ve captured thermal images of the area, the next step is to interpret what they reveal. Look for cooler spots that stand out from the surrounding dry areas, as these indicate moisture presence. Moisture lowers surface temperature, creating distinct temperature variations in the images. Focus on areas showing irregular color patterns, such as dark patches in a thermal map, which often signal hidden water. Keep in mind that insulation, drafts, or other heat sources can also affect readings, so consider the context. Compare different images taken at various times to identify consistent problem spots. Regularly monitoring moisture levels can help confirm the presence of persistent issues. With practice, you’ll recognize the thermal signatures of moisture and accurately pinpoint problem areas beneath carpets, saving time and avoiding unnecessary repairs.
Advantages of Using Thermal Imaging Over Traditional Methods
Thermal imaging offers a non-invasive way to detect issues without damaging surfaces or disturbing the environment. It speeds up inspections, allowing you to identify problems quickly and efficiently. Plus, it pinpoints moisture with high accuracy, helping you address issues early and effectively. Additionally, thermal imaging can help identify dog names that suit specific breeds or personalities, providing personalized options for pet owners.
Non-Invasive Detection Method
Because thermal imaging detects temperature variations without direct contact, it offers a significant advantage over traditional methods that often require invasive procedures or physical sampling. You can quickly identify hidden moisture without disturbing carpets or flooring. Unlike destructive methods, thermal imaging is non-invasive, meaning there’s no need to cut, lift, or remove sections of your flooring. This reduces damage and saves time and money. The technology provides instant visual evidence of moisture, allowing you to pinpoint problem areas precisely. You won’t have to rely on guesswork or wait for laboratory results. Instead, you get immediate, accurate insights into moisture locations, making inspections faster, more efficient, and less disruptive. This approach ensures you address issues early before they develop into costly repairs. Understanding the technology behind thermal imaging enhances your ability to interpret results correctly and make informed decisions.
Faster Inspection Process
Traditional moisture detection methods often involve time-consuming procedures like core sampling or destructive testing, which can delay your ability to address issues. With thermal imaging, you can quickly scan large areas and identify hidden moisture spots in a fraction of the time. The infrared camera instantly detects temperature differences caused by moisture, allowing you to pinpoint problem areas without dismantling floors or walls. This rapid assessment enables you to make informed decisions faster, reducing downtime and preventing further damage. Unlike traditional methods that require multiple steps and waiting periods, thermal imaging provides immediate visual feedback. As a result, you can streamline inspections, prioritize repairs efficiently, and minimize disruptions, all while ensuring thorough detection of moisture problems. Incorporating infrared technology enhances accuracy and speeds up the entire inspection process.
Accurate Moisture Localization
While conventional moisture detection methods often rely on invasive procedures or multiple testing steps, thermal imaging offers a more precise way to locate moisture hotspots. With thermal cameras, you can quickly identify temperature differences caused by moisture presence beneath surfaces. This allows you to pinpoint exactly where the hidden moisture is, without guesswork or unnecessary damage. Unlike traditional methods that may require drilling or sampling, thermal imaging provides real-time, non-invasive visualization. This accuracy helps you target problem areas efficiently, saving time and reducing costs. As a result, you can address moisture issues early, preventing mold growth and structural damage. Overall, thermal imaging enhances your ability to precisely locate moisture, making inspections faster, more reliable, and less disruptive.
Limitations and Considerations When Using Thermal Cameras

Thermal cameras, despite their versatility, have limitations that you need to take into account to ensure accurate results. One major factor is surface temperature variations; materials like carpets or furniture can obscure moisture detection because they insulate or reflect heat differently. Environmental conditions also affect readings—drafts, sunlight, or cold spots can create false signals or hide moisture. Additionally, thermal imaging shows surface temperature, not moisture directly, so interpreting images requires experience. Time of day impacts accuracy too, as temperature differences may be less pronounced in certain conditions. Ultimately, thermal cameras aren’t foolproof; they can miss moisture trapped behind walls or under thick materials. To get reliable results, combine thermal imaging with other detection methods and consider the environment’s influence on thermal readings.
Maintaining and Monitoring Moisture Levels After Detection
After detecting moisture issues, you need to keep a close eye on the area with regular checks to prevent future problems. Implementing effective ventilation strategies helps control humidity levels and dries out affected spaces. Staying proactive guarantees moisture doesn’t return and keeps your environment safe and healthy.
Regular Moisture Checks
Regular moisture checks are essential to guarantee that detected dampness levels stay within safe limits and prevent further damage. After identifying hidden moisture, you should regularly inspect the affected areas to ensure the problem doesn’t worsen. Use a moisture meter or thermal imaging periodically to monitor changes in moisture levels. Consistent checks help you catch any rising dampness early, avoiding structural issues or mold growth. Keep records of your readings to spot trends over time. If moisture levels increase, take immediate action to address the source. Regular monitoring also confirms that previous repairs are holding up. By staying vigilant, you maintain a healthier environment and protect your property from long-term damage caused by concealed moisture.
Effective Ventilation Strategies
To effectively maintain and monitor moisture levels after detecting dampness, implementing proper ventilation strategies is essential. You should regularly open windows and doors to promote airflow, especially after cleaning or if humidity rises. Use exhaust fans in bathrooms and kitchens to remove excess moisture generated during daily activities. Installing or upgrading ventilation systems, like exhaust fans or air exchangers, helps maintain consistent airflow and moisture control. Keep vents unobstructed, and consider using dehumidifiers in areas prone to dampness. Monitoring humidity levels with a hygrometer ensures you stay within the ideal range of 30-50%. Consistent airflow prevents mold growth and structural damage, making your space healthier and more comfortable. Proper ventilation is a proactive step to keep moisture levels in check after initial detection.
Professional vs. DIY Thermal Moisture Inspection: Which Is Right for You?
Deciding between a professional and a DIY thermal moisture inspection depends on your specific needs, budget, and expertise. If you have experience with thermal imaging tools and want quick results, a DIY approach might work. However, professionals offer more accurate readings, specialized equipment, and exhaustive assessments. Consider these points:
- Accuracy: Professionals use advanced equipment for precise detection.
- Experience: Experts interpret thermal images correctly, reducing false positives.
- Cost: DIY saves money upfront but risks missing hidden issues.
- Time & Effort: Professionals handle inspections efficiently, saving you time.
If you’re unsure about reading thermal images or dealing with complex moisture problems, hiring a professional ensures thorough, reliable results. For simple, small areas, DIY could suffice; for larger or more critical issues, professional inspection is the smarter choice.
Frequently Asked Questions
Can Thermal Imaging Detect Moisture Through Multiple Layers of Flooring?
You might wonder if thermal imaging can detect moisture through multiple flooring layers. It can sometimes identify hidden moisture, but its effectiveness depends on the materials and thickness of those layers. Generally, thermal cameras detect temperature differences caused by moisture. If moisture causes a noticeable temperature variation, you’ll likely see it. However, thick or insulating layers may obscure these differences, making detection more challenging.
How Accurate Is Thermal Imaging in Identifying Moisture Compared to Invasive Methods?
Did you know thermal imaging detects moisture with up to 95% accuracy? When comparing it to invasive methods like drilling or sampling, thermal imaging is less destructive, faster, and non-intrusive. While invasive techniques might be more precise in certain cases, thermal imaging provides reliable results quickly, helping you identify hidden moisture without damage. Its high accuracy makes it a valuable tool in moisture detection, especially for initial assessments.
What Are the Limitations of Thermal Imaging in Detecting Moisture on Different Carpet Types?
You might wonder about thermal imaging’s limitations across various carpet types. It struggles with dense or thick carpets, as they insulate moisture, making detection difficult. Light-colored or reflective carpets can also challenge thermal cameras, causing inaccurate readings. Additionally, surface temperature fluctuations from sunlight or heating can affect results. To get accurate moisture detection, consider carpet material and environmental conditions, and combine thermal imaging with other assessment methods.
Does Ambient Temperature Affect the Effectiveness of Thermal Moisture Detection?
Sure, ambient temperature doesn’t impact thermal imaging’s ability to detect moisture, right? In reality, it does. Warmer air can mask temperature differences, making moisture harder to spot. Cooler environments might exaggerate these differences, making detection easier. So, you often find yourself fighting the weather conditions, realizing that the effectiveness of thermal imaging is pretty much at the mercy of the surrounding temperature, just when you thought it was foolproof.
How Often Should Thermal Inspections Be Performed After Initial Moisture Detection?
You should perform thermal inspections regularly to guarantee no hidden moisture causes future damage. After an initial detection, schedule follow-up inspections every few weeks or monthly, depending on the severity and environmental conditions. This proactive approach helps catch any lingering or recurring moisture early. Consistent monitoring minimizes mold growth, structural issues, and costly repairs, keeping your space safe and dry over time.
Conclusion
Just like Sherlock Holmes uncovering hidden clues, thermal imaging reveals moisture lurking beneath your carpets. By understanding how heat signatures expose hidden issues, you can prevent mold and damage before they escalate. Whether you choose a professional or DIY approach, embracing this technology empowers you to solve mysteries beneath the surface. Don’t wait for a sign—be the detective of your own home’s health, and keep your space safe and dry.