
TL;DR

Get cleaning gear delivered free with Prime
- Fast, free delivery on millions of items
- Prime Video, Amazon Music and more included
- Member-only deals all year
A Hunker DIY report outlines how to make a front-door wreath from cleaned pistachio shells, paint, glue and a cardboard or pool-noodle base. The shells are layered into flower shapes, then attached to the wreath form; the project takes time, and its outdoor durability is not independently established in the source.
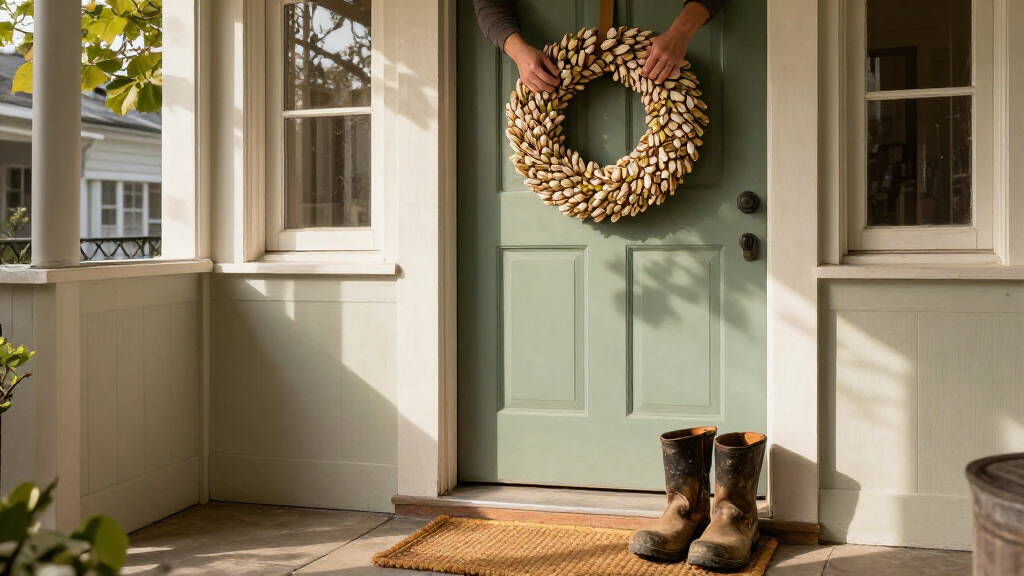
Hunker has published a DIY guide for making a front-door wreath from pistachio shells, turning a normally discarded kitchen byproduct into painted, layered flower shapes. The project uses a wreath base, adhesive and ribbon or twine, and offers a reusable alternative to fresh-flower decorations, though the source does not provide independent testing of how well it withstands outdoor conditions.
The process begins with a wreath form made from a cut cardboard ring, a pool noodle bent into a circle and secured with duct tape, or an old wreath reused from storage. Hunker suggests a 24-inch-diameter form for a standard 36-inch-wide door. Twine or decorative ribbon can cover a cardboard or noodle base and provide a finished surface for the shell flowers.
Before assembly, rinse the shells in hot water to remove residue, then spread them on a baking sheet to dry. Paint them once dry, covering both sides; different colors or shades can be grouped to create a varied floral effect. To make each flower, glue three or four shells upright at the center of a small cardboard circle, then add more shells in overlapping layers, applying glue along the lower edge of each shell.
After making enough flowers for the design, attach them to the wreath base with adhesive. The guide lists a glue gun, super glue or B7000 as options, along with cardboard, a craft knife, paint and ribbon or twine. It recommends allowing glue to set before hanging the wreath with a ribbon. Hunker says the hanging point should sit 14 inches below the top of the door and cautions that the small assembly steps require time.
A Reusable Alternative to Fresh Blooms
The project offers a way to reuse a material that might otherwise be thrown away and customize a seasonal door decoration without buying fresh flowers. Hunker presents the idea as budget-friendly, particularly for households that already have pistachio shells, cardboard or an unused wreath. The actual cost will depend on whether makers need to purchase paint, adhesive, ribbon or a base.
Its appeal also comes from flexibility: colors and ribbon can be changed to suit a season or occasion, while the layered shells give the flowers a textured appearance. Hunker says the finished blooms should hold up season after season and tolerate everyday handling, unlike fresh flowers that can wilt. That is the report’s claim; it does not specify weather tests, a lifespan or whether the wreath should be kept under cover.
Products Worth Considering

Philips Hue Play HDMI Sync Box 4K with 65-Inch Play Gradient Light Strip

Samsung 65-Inch The Frame Pro Neo QLED 4K TV (2026) Bundle with Modern Brown Bezel, HDMI Cables, and Home Theater Guide

Philips Hue Play Screen Sync and 65-Inch Play Gradient Smart TV Light Strip
As an affiliate, we earn on qualifying purchases.
From Kitchen Scraps to Wreath Form
The source frames the project as an alternative to store-bought or fresh-flower wreaths, which it says may cost more or look similar to decorations used by neighbors. Its proposed solution is a hand-built arrangement: shells become individual flowers, and a ring of cardboard or another base supports them.
The instructions provide two base options rather than requiring a specialized wreath form. Reused shoe or shipping boxes can be cut into a ring; a pool noodle can be joined with duct tape and wrapped in twine or ribbon. The maker can also repurpose an existing wreath. The guide does not give a shell count, exact flower dimensions, drying time, paint quantity or step-by-step estimates for the total work.
““you’ll have to sweat the small details for this DIY.””
— Hunker
Outdoor Durability Is Not Tested
The supplied report does not say whether the finished wreath was tested in direct sunlight, rain, humidity or changing temperatures. Its statement that the flowers will last season after season should be treated as Hunker’s characterization, not a verified performance finding. It also does not identify a paint or adhesive rated for outdoor use, or explain how to protect the cardboard base from moisture.
Other practical details are left to the maker: how many shells a wreath requires, how long each stage takes, how much the materials cost if bought new, and whether a particular adhesive is suitable for the intended conditions. The instructions call for hot-water rinsing, but do not provide additional cleaning or handling guidance.
Plan Materials Before Assembly
The next step for anyone trying the project is to choose a base and design, then collect and clean enough shells before painting and assembly. Because the guide gives no shell count or fixed schedule, makers will need to judge the quantity and allow time for the shells and paint to dry, as well as for the adhesive to set.
For a wreath intended to hang outdoors, the source leaves weather suitability unresolved. Readers should check product labels for the paint and adhesive they choose and decide whether to place the finished decoration somewhere sheltered. Hunker’s instructions describe the craft method, but do not provide an independent durability assessment or a tested outdoor-care plan.
Key Questions
What materials does the pistachio shell wreath use?
The guide lists pistachio shells, a wreath base, adhesive, paint and ribbon or twine. A craft knife may be needed for a cardboard base. The base can be made from a box, a pool noodle or an old wreath.
How are the shells arranged to look like flowers?
Glue three or four shells upright in the center of a small cardboard circle, then add more shells in overlapping layers around them. Hunker recommends painting both sides of the cleaned, dried shells before assembling the flowers.
Will this wreath last outdoors?
Hunker says the shell blooms can hold up season after season, but its report does not describe weather testing or name outdoor-rated paint and adhesive. Outdoor durability is not confirmed by the supplied source.
How large should the wreath be?
For a standard 36-inch-wide door, Hunker suggests a wreath form with a 24-inch diameter. The finished size can vary with the base and flower arrangement.
How much time does the project take?
The report gives no time estimate. It warns that the work involves small details, and makers will also need to allow time for shells to dry after rinsing, paint to dry and adhesive to set.
Source: hunker.com