
To make a DIY blocking board for rug repair, gather a sturdy, flat surface like foam or cork, along with measuring tools, pins, and cutting utensils. Cut your base to size, assemble a frame from wood or metal, and attach your surface securely. Mark measurement grids and add pins for holding the rug in place. Finish with non-slip pads for stability. For detailed steps, continue exploring how to build a durable and effective blocking board.
Key Takeaways
- Select a sturdy, flat base surface like foam board or cork for durability.
- Measure and cut the base surface to your rug’s dimensions for a precise fit.
- Build a frame from wood or metal to securely hold the base and prevent warping.
- Attach foam or cork to the frame, ensuring it’s smooth and properly aligned.
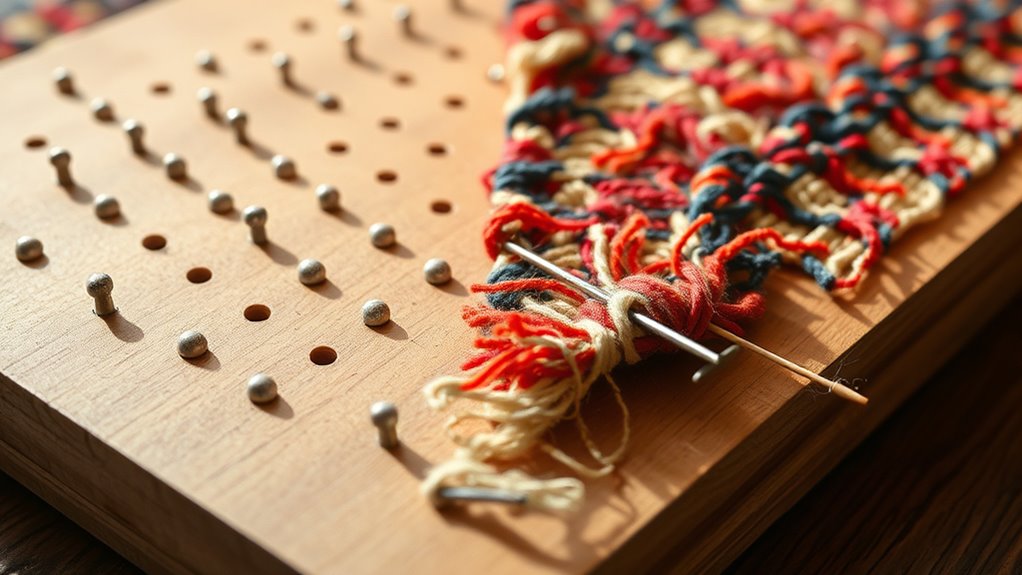
- Use rust-proof pins to secure the rug during blocking, and finish with non-slip feet for stability.
Gathering Materials and Tools
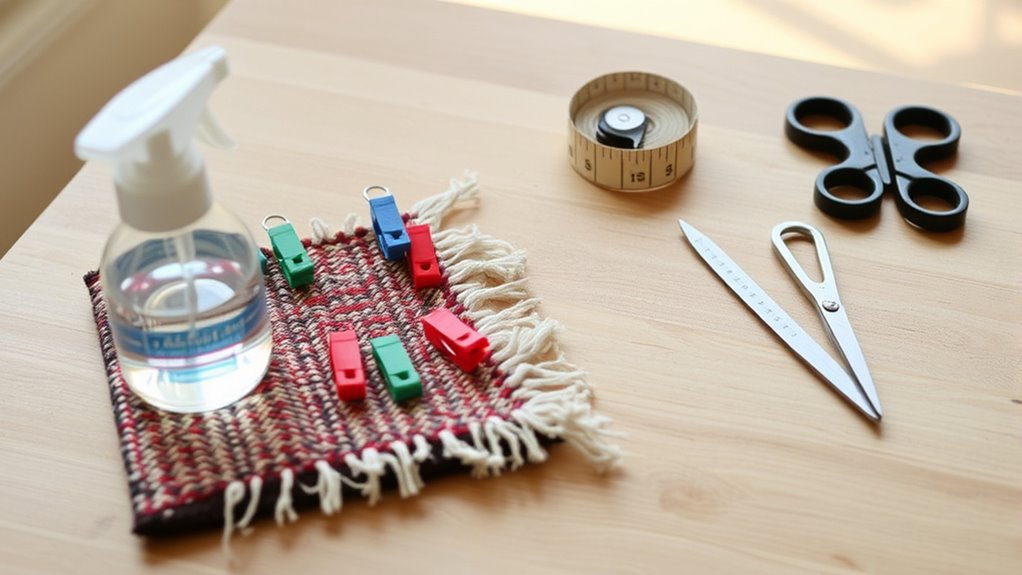
Before you begin building your DIY blocking board, acquiring all the necessary materials and tools is essential. You’ll need a sturdy, flat surface like foam board, cork board, or a wooden panel for the base. Gather straight pins or T-pins to hold your rug in place securely. A ruler or measuring tape will help guarantee accurate dimensions, while a pencil is vital for marking. You might also want a fabric or foam padding to add cushioning, depending on your rug’s thickness. Additionally, gather scissors or a utility knife for any trimming. Having these tools ready saves you time and keeps your project on track. Double-check your list before starting to avoid interruptions once you begin preparing your blocking board. Utilizing proper maintenance and cleaning routines for your tools can also ensure consistent results.
Cutting and Preparing the Base Surface
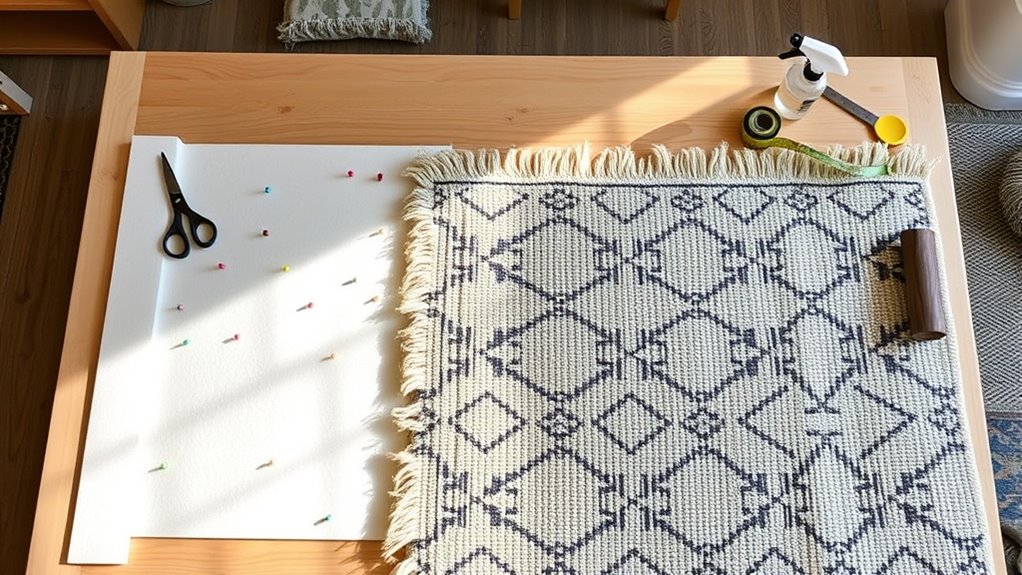
Start by measuring the dimensions of your rug and marking them clearly on your chosen base surface. Use a ruler or measuring tape to get accurate measurements, then draw straight lines with a pencil or chalk. This guarantees your rug will be properly aligned during blocking. Next, cut the base surface to size using a utility knife or scissors, depending on the material. If you’re using foam board or cork, cut slowly and steadily to get clean edges. Smooth out any rough or uneven edges with fine-grit sandpaper or a file. Make sure the surface is flat and free of debris before proceeding. Properly preparing your base surface ensures stability and precision when blocking your rug. Additionally, ensuring the surface is free of dust and debris can prevent clogging of your tools and maintain a smooth finish.
Creating a Frame for the Blocking Board
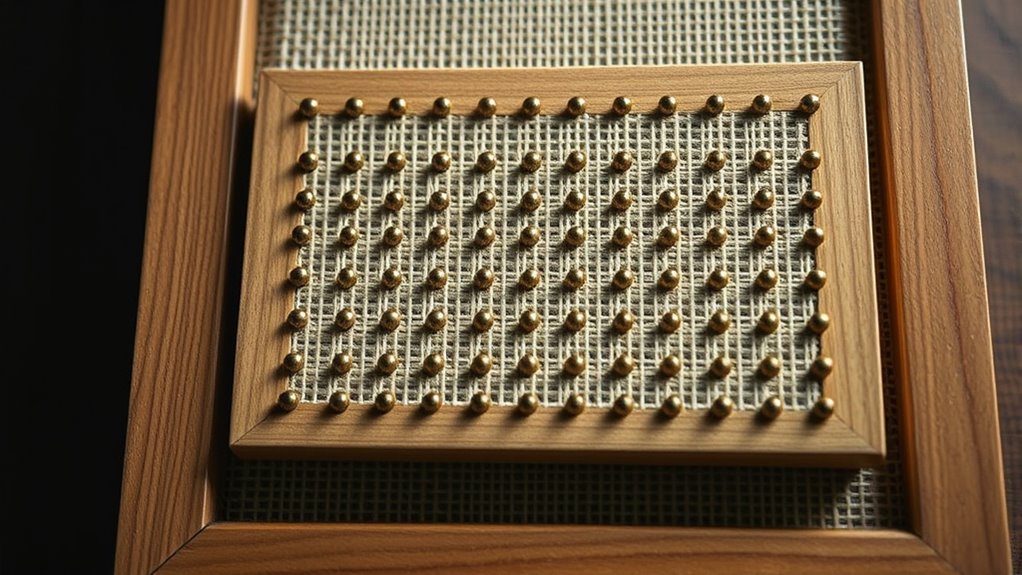
Creating a sturdy frame for your blocking board guarantees it stays in place and provides a reliable edge for stretching your rug. To build the frame, choose a strong, lightweight material like wood or metal. Measure the dimensions of your prepared base surface, then cut the frame pieces accordingly. Assemble the frame using nails or screws, ensuring corners are square for stability. Sand any rough edges to prevent damage to your rug. Secure the frame tightly around the perimeter of your base surface, making sure it’s flush and level. A well-constructed frame offers consistent tension and prevents shifting during the blocking process. Take your time to ensure all joints are solid and the frame is sturdy, setting a reliable foundation for your DIY blocking board. Incorporating appropriate tools and techniques from the Textile Line can further enhance the durability and precision of your frame construction.
Assembling the Components
With the frame securely in place, it’s time to assemble the components that will make your blocking board functional. Begin by attaching your foam or cork surface to the top of the frame using a strong adhesive or double-sided tape. Confirm it covers the entire surface evenly, pressing firmly to eliminate air bubbles. Next, lay out your grid or measurement markings—these can be drawn directly on the surface or applied as stickers. If you’re using push pins or T-pins, position them around the edges of the frame to keep your rug in place during blocking. Double-check that all components are securely attached and aligned properly. This step is vital for a sturdy, functional blocking board that will serve you well in your rug repair projects.
Finishing Touches and Usage Tips

Once your blocking board is assembled, adding finishing touches can enhance its durability and usability. Seal any raw edges with a protective finish or a light coat of paint to prevent splintering over time. Consider attaching non-slip pads or rubber feet to the bottom to keep it stable during use. When working on a rug, use rust-proof pins or T-pins to hold your project securely without damaging the fibers. Keep your board clean by wiping it down after each use, especially if you’ve applied any adhesive or paint. Store it in a dry, flat position to prevent warping. Regularly check for loose joints or screws and tighten them as needed. Proper materials selection can also extend the life of your DIY blocking board. These simple tips ensure your DIY blocking board remains reliable for many projects ahead.
Frequently Asked Questions
What Types of Rugs Are Suitable for DIY Blocking?
When choosing rugs for DIY blocking, you want to focus on natural fibers like wool, cotton, or silk, as they respond well to shaping and stretching. Avoid delicate or synthetic materials that might melt or deform. Knitted or woven rugs tend to hold their shape better after blocking. Make sure your rug isn’t too fragile or heavily textured, so you can safely reshape it without causing damage.
Can I Reuse My DIY Blocking Board for Different Projects?
Did you know that many crafters reuse their blocking boards up to five times? Yes, you can reuse your DIY blocking board for different projects, but it’s best to clean it thoroughly between uses to avoid transferring fibers or residues. Make sure your board remains flat and undamaged for the best results. Proper maintenance guarantees your board stays versatile and effective for all your rug repair and craft needs.
How Do I Prevent Damage to Delicate Rug Fibers?
To prevent damage to delicate rug fibers, you should handle your rug carefully and avoid aggressive stretching. Use a gentle touch when pinning or tacking, and opt for soft, non-abrasive materials like foam or felt underneath. Keep the fibers moist but not soaked, and avoid direct heat or harsh chemicals. Regularly inspect your work to guarantee no fibers are being pulled or frayed, maintaining your rug’s integrity.
What Is the Best Storage Method for the Finished Board?
You want to store your finished board properly to keep it in great condition. Keep it in a cool, dry place away from direct sunlight, which can cause warping or fading. You should store it flat or upright, leaning gently against a wall, and avoid stacking heavy items on top. Cover it with a cloth or plastic to protect it from dust and moisture, ensuring it stays ready for your next project.
How Often Should I Re-Block My Rugs After Repair?
You should re-block your rugs whenever they start to lose their shape or appear uneven after repair. Typically, this might be every few months or if you notice stretching or curling. Regular re-blocking helps maintain their appearance and durability. Keep an eye on your rugs, and if you see signs of distortion, take the time to re-block them promptly. This keeps your rug looking fresh and well-maintained over time.
Conclusion
Now that your DIY blocking board is complete, you’re ready to transform your rug repairs. Imagine the satisfaction as you gently stretch and secure your rug, knowing you crafted this tool with your own hands. But don’t rush—take a moment to appreciate the process and the potential it holds. Soon, your rugs will look flawless, and you’ll wonder why you didn’t make this sooner. The perfect finish is just a stretch away—are you ready to see the magic unfold?