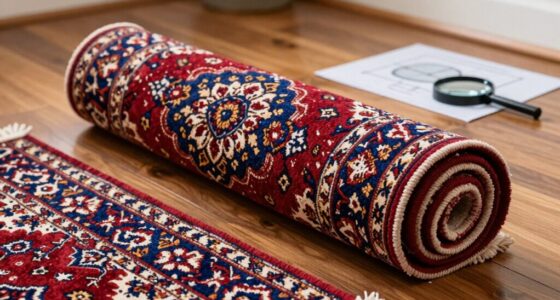
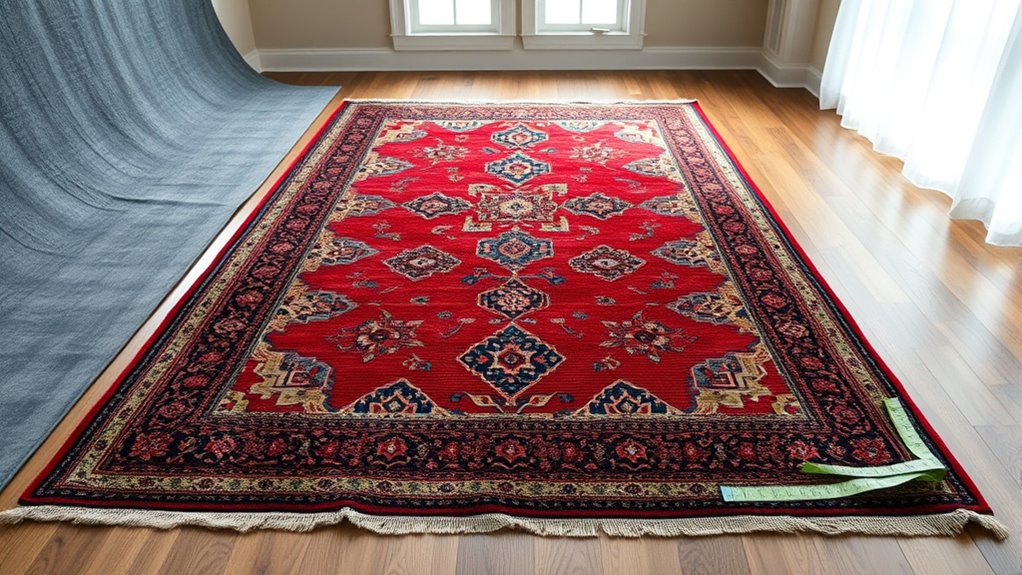
To photograph your rug for insurance appraisals, start by thoroughly cleaning and flattening it, making sure it’s dry and free of debris. Use a high-quality camera or smartphone with proper lighting—preferably natural or diffused artificial light—to capture clear, true-to-life colors. Take wide shots showing the entire rug, plus close-ups of detailed features, while keeping the camera steady. Organize your photos with descriptive filenames and backups to guarantee accurate documentation; if you continue, you’ll learn more tips for perfect results.
Key Takeaways
- Clean and thoroughly dry the rug, then lay it flat on a neutral background to showcase true color and condition.
- Use a high-resolution camera with consistent lighting, avoiding shadows and glare, to capture detailed, accurate images.
- Take wide shots of the entire rug and multiple close-ups of borders, patterns, and any damage or unique features.
- Include context shots showing the rug in its placement within the room for size and style reference.
- Organize and label photos systematically, noting any existing damages or stains for comprehensive documentation.

4K Digital Camera for Photography Travel, 56MP Autofocus Vlogging Camera for YouTube, 16X Zoom with 3" 180°Flip Screen & Lens Hood, 32GB Card, Gift Ideas for Teens & Beginners
- 4K UHD 56MP Autofocus: Records in 4K at 30FPS with sharp photos
- 180° Flip Screen: Perfect for selfies and vlogging
- 16X Digital Zoom: Captures distant scenes with clarity
As an affiliate, we earn on qualifying purchases.
As an affiliate, we earn on qualifying purchases.
Preparing Your Rug for Photography
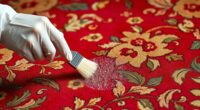
Before you start photographing your rug for insurance purposes, it’s essential to prepare it properly. Begin by giving it a thorough rug cleaning to remove dust, dirt, and debris that could obscure details. If there are stains, focus on stain removal techniques to eliminate discoloration, ensuring the rug looks its best. Use gentle cleaning methods suited for your rug’s material to avoid damage. Make sure the rug is completely dry before photographing, as dampness can cause reflections or distort colors. Fluff up the fibers to restore its appearance and lay it flat on a clean, neutral surface. Proper cleaning and stain removal help reveal the true condition of your rug, making your insurance photos more accurate and exhaustive. Additionally, be aware that cheating can sometimes be hidden through subtle signs, so ensuring your rug’s condition is clearly documented can help prevent disputes. Recognizing AI vulnerabilities in documentation processes is also important to ensure the integrity of your records. Being aware of digital literacy can help you better understand how to accurately capture and preserve the condition of your rug for future reference. Developing a good understanding of photo composition can further enhance the clarity and detail of your photographs, providing a more comprehensive record.
Choosing the Right Equipment and Setting
Selecting the right equipment and setting is vital to capturing clear, detailed photos of your rug for insurance. Use a good-quality camera or smartphone with a high-resolution setting to guarantee detailed images. Proper frame selection is essential; choose a neutral, uncluttered background that highlights the rug’s colors and patterns without distraction. Before photographing, make sure your rug is clean from dust and loose fibers—consider a quick rug cleaning if necessary—to prevent dirt from obscuring details. Use natural light or diffused artificial lighting to minimize shadows and glare, which can distort the image. Keep the camera steady, using a tripod if possible, to avoid blurriness. Adjust your camera settings for sharpness and clarity, ensuring every detail of the rug is accurately documented. Additionally, ensure your environment offers good security, as this can help prevent theft or tampering during the photographing process. Proper lighting can also help showcase the rug’s texture and color fidelity more accurately. Being aware of insurance requirements for documentation can further ensure your photos meet necessary standards. Understanding how to handle camera equipment effectively can make a significant difference in the quality of your photos.
Capturing Overall Views and Layout
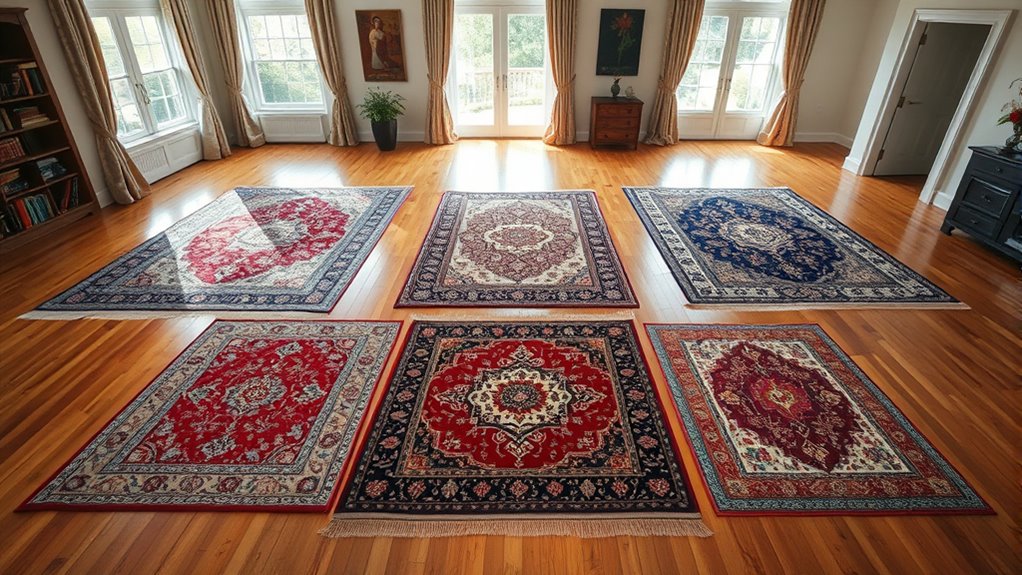
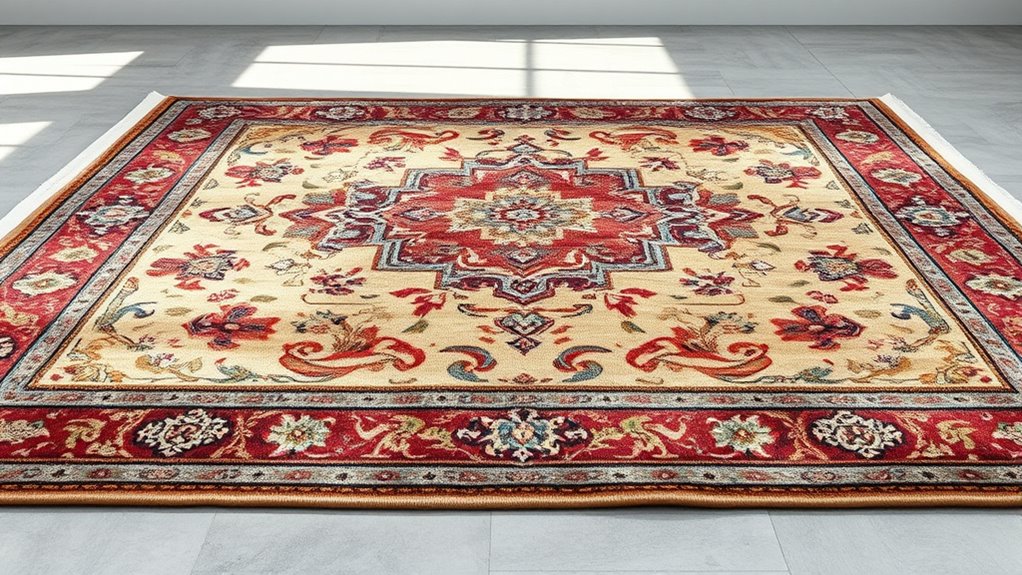
Using wide-angle shots helps you capture the entire rug and its placement in the room, providing a thorough view. Make sure your photos are clear and well-lit to show the rug’s condition and details. Including a clean, accurate floor plan alongside these images offers a helpful layout reference for your insurance claim. Additionally, documenting color accuracy ensures the true colors of the rug are represented accurately in your photographs. Incorporating techniques from sound healing science can also help maintain a calm and focused mindset while photographing delicate or valuable items. For added assurance, consider using a high-quality vacuum to clean the rug beforehand, which can help reveal any hidden stains or damages that need to be documented.
Wide-Angle Shots
Wide-angle shots are essential for capturing the entire rug and its placement within a room, providing a clear overview for insurance purposes. To guarantee accurate documentation, start by calibrating your camera’s color settings so the rug’s true colors are represented. Use a lens with minimal distortion to avoid warping the edges, which could misrepresent the rug’s size or shape. Keep the camera level and maintain a consistent distance to prevent skewed perspectives. Take multiple shots from different angles to highlight the rug’s position relative to furniture and room features. Properly calibrated color and minimized lens distortion help create a true-to-life image, making your documentation reliable for insurance claims. Additionally, understanding the layout and design of the room can assist in providing context for the rug’s placement. Paying attention to lighting conditions can also significantly impact the clarity and accuracy of the photographs. Being aware of the resources and tools available, such as reflectors or additional lighting, can further improve image quality. Utilizing market insights can help you better understand how to document the unique features of your rug for insurance purposes. Incorporating proper camera techniques ensures the photographs accurately represent the rug’s details and condition. These wide-angle shots form the foundation for a thorough rug appraisal.
Clear Floor Plans
To accurately document a rug within its environment, capturing clear floor plans that show the overall layout and placement is key. These photos help insurers understand the rug’s context, size, and relation to other elements. Focus on wide shots that include furniture, walls, and flooring to demonstrate its positioning. Additionally, considering the water-resistant materials used in some rugs can be valuable for assessing durability and maintenance needs. Proper documentation of the surrounding space can also assist in identifying any potential damage vulnerabilities, ensuring comprehensive coverage. Remember, a well-documented layout can reveal the rug’s historical significance and the need for expert rug cleaning if damage is evident.
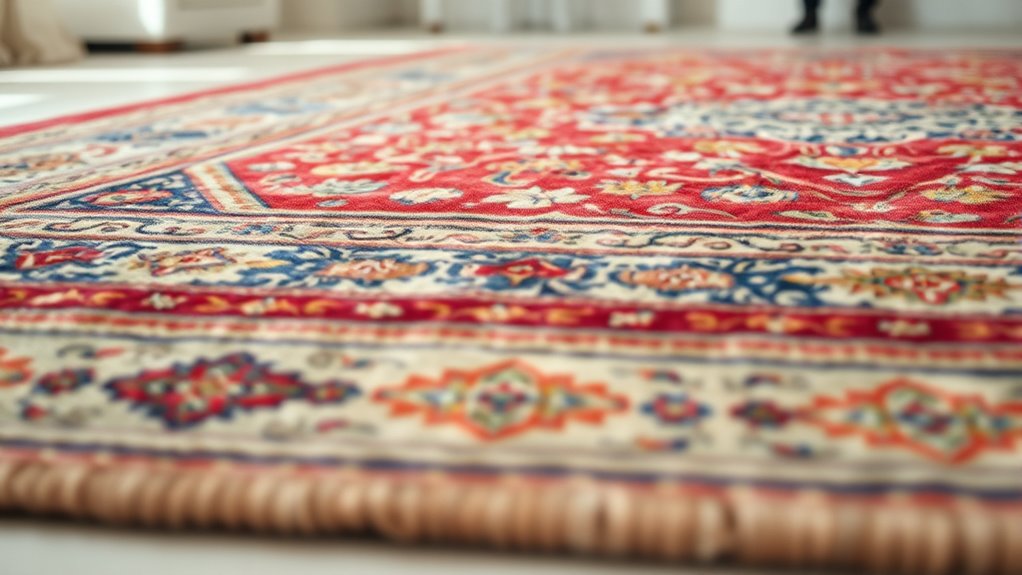
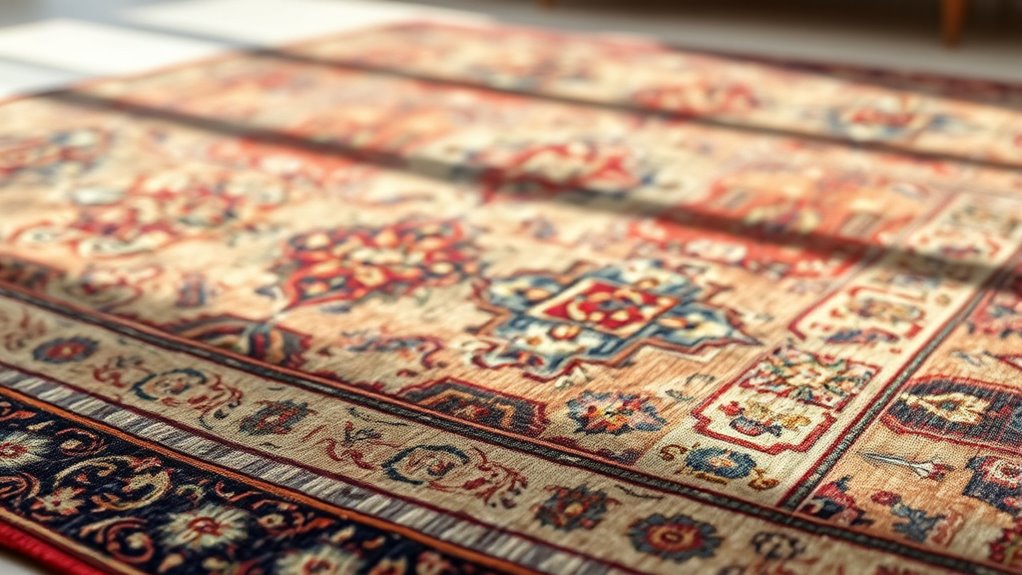
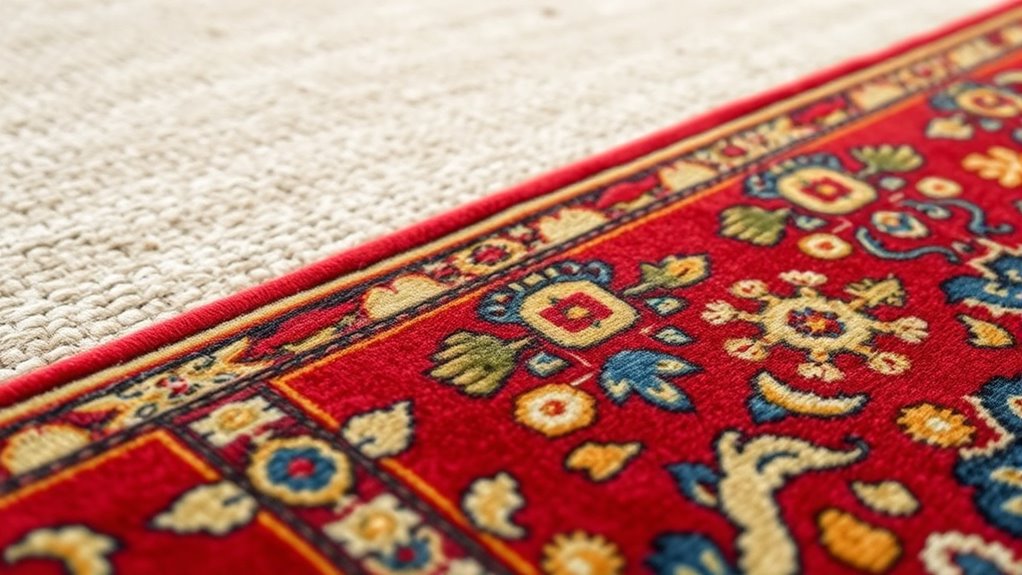
Highlighting Unique Features and Details
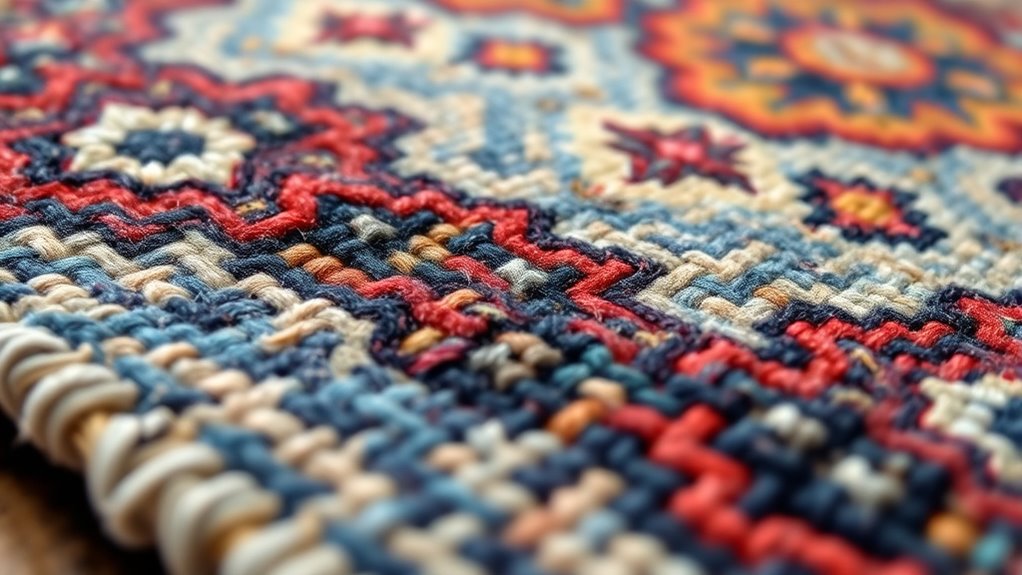
When photographing rugs for insurance purposes, it’s essential to focus on capturing their unique features and intricate details. To do this effectively, zoom in on areas that showcase craftsmanship, such as borders, motifs, and texture variations. Guarantee your camera settings prioritize color accuracy so the rug’s true hues are preserved, which helps in accurate valuation. Use close-up details to highlight any distinctive patterns, rare weaving techniques, or embellishments that set the rug apart. These detailed shots provide a thorough record of the rug’s quality and originality, making it easier for insurers to assess its value. Take multiple angles to document all important features, and stay steady to avoid blurry images that could obscure fine details.
Ensuring Proper Lighting and Color Accuracy
Proper lighting is essential for capturing accurate colors and fine details in your rug photographs. To guarantee this, focus on effective lighting techniques that minimize shadows and glare. Use diffuse light sources or softboxes to create even illumination. Additionally, perform color calibration with a gray card or color reference to match the true hues of your rug. This step ensures that colors are consistent across different devices and lighting conditions. Remember these key principles:
- Use consistent, soft lighting to reveal true colors.
- Perform color calibration before shooting for accuracy.
- Avoid mixed lighting sources to prevent color distortion.
Organizing and Saving Your Photos for Documentation
Organizing and saving your photos systematically guarantees you can quickly locate specific images when needed for insurance claims or documentation. Effective inventory management and photo cataloging are essential. Create folders labeled by rug type, location, or date to streamline access. Use descriptive filenames to identify each image easily, such as “LivingRoom_Rug_2024-04-27.” Consider maintaining a spreadsheet or digital log that details each photo, including condition notes and purchase info. Here’s an example to visualize:
| Rug Location | Photo Filename | Date | Condition | Notes |
|---|---|---|---|---|
| Living Room | LivingRoom_Rug_2024-04-27 | 2024-04-27 | Excellent | Recently cleaned |
| Bedroom | Bedroom_Rug_2024-04-28 | 2024-04-28 | Good | Slight wear on edge |
| Dining Area | Dining_Rug_2024-04-29 | 2024-04-29 | Fair | Small stain |
This approach ensures your documentation is clear, accessible, and ready when needed.
Frequently Asked Questions
How Can I Prevent Reflections or Glare When Photographing Shiny or Reflective Rugs?
To prevent reflections or glare when photographing shiny or reflective rugs, you should focus on effective lighting techniques and camera settings. Use diffused lighting, like softboxes or indirect sunlight, to minimize harsh reflections. Adjust your camera’s angle and use a polarizing filter to reduce glare. Keep your camera settings steady, such as lowering ISO and adjusting aperture, to ensure clear images without unwanted reflections. This approach captures the rug’s true details without glare interference.
What Angles Are Best to Showcase the Rug’s Texture and Pile Height?
To showcase a rug’s texture and pile height, focus on angle selection that highlights its depth. Use side angles or a slight tilt to capture the pile’s layers effectively. Combine this with lighting techniques like diffused light to enhance details without glare. Avoid shooting straight on, as it flattens the appearance. Carefully adjusting your angles and lighting guarantees the rug’s rich textures and height stand out clearly.
How Do I Photograph Large Rugs That Cannot Be Fully Captured in a Single Shot?
When photographing large rugs that can’t fit in one shot, you should take multiple overlapping images from various angles. Use panoramic stitching software to seamlessly combine these photos, ensuring no details are missed. For an even broader perspective, consider aerial photography if possible, which captures the entire rug from above. This approach provides all-encompassing coverage, making sure all details are clear and well-documented for insurance purposes.
What Should I Do if the Color of the Rug Appears Different in Photos?
Oh, the joys of photography—where colors can be wildly unpredictable! If your rug’s color looks off, don’t panic. You can do some color correction in editing and make lighting adjustments during the shoot. Use natural light or soft, even lighting to capture true hues. A little patience with these tweaks guarantees your photos reflect the real colors, making insurance appraisals smooth and hassle-free.
How Can I Document Damage or Stains Accurately for Insurance Purposes?
To document damage or stains accurately for insurance, focus on color consistency by using natural light and avoiding harsh shadows. Take clear, close-up photos that highlight the affected areas, ensuring details are visible. Adjust your lighting if needed to prevent glare or color distortion. Include a scale or ruler for size reference. Consistent angles and lighting will help create a precise record, making your claim process smoother and more reliable.
Conclusion
By following these tips, you’ll guarantee your rug is accurately documented for insurance purposes. For example, a homeowner who photographed her antique rug with clear close-ups and proper lighting was able to quickly process her claim after a minor stain. Proper photos not only protect your valuable pieces but also streamline the insurance process. So, take your time, get detailed shots, and keep everything organized—you’ll be glad you did if you ever need to file a claim.