When testing antique textiles for dye stability, choose discreet areas like behind seams or inside hems to prevent visible damage. Use small amounts of gentle solutions, like distilled water or pH strips, and apply them carefully with a dropper or soft brush. Observe any color changes immediately and over time to assess stability. Following these safe spot-testing techniques helps protect the fabric’s integrity—if you keep exploring, you’ll discover how to interpret your results accurately.
Key Takeaways
- Select discreet, hidden areas of the textile, like seams or hems, for testing to prevent visible damage.
- Use minimal amounts of gentle testing solutions, such as distilled water or pH-neutral reagents.
- Apply solutions carefully with soft tools (cotton swabs or dropper) to avoid fabric damage.
- Observe immediate and long-term reactions, noting color changes or bleeding for dye stability assessment.
- Document all test conditions and results meticulously to inform conservation and handling strategies.

Anderson Manufacturing 2 Set FT601 Dye Tester Pre-Filled
Product Type: OUTDOOR LIVING
As an affiliate, we earn on qualifying purchases.
As an affiliate, we earn on qualifying purchases.
Understanding the Importance of Dye Stability in Antique Textiles

Understanding the importance of dye stability in antique textiles is crucial because it directly affects their preservation and value. If the dyes are chemically unstable, they can fade or change color over time, diminishing the textile’s authenticity and worth. Conducting colorfastness testing helps determine how well dyes withstand environmental factors like light, humidity, and cleaning. This testing assesses the chemical stability of dyes, giving you insight into their durability. When dyes are stable, they retain their original hue and vibrancy, ensuring the textile remains authentic and valuable. Recognizing the significance of dye stability guides you in proper handling, conservation, and display, preventing unnecessary damage. Additionally, understanding fading mechanisms enables conservators to implement appropriate preservation strategies. This knowledge of chemical stability is essential for making informed decisions about cleaning and storage conditions. Proper testing methods can also reveal the influence of environmental factors on dye longevity. Awareness of dye composition can help identify potential vulnerabilities in textile dyes. Moreover, understanding dye degradation processes allows for better prediction of how textiles will age over time. Ultimately, understanding and testing dye stability safeguards these historical textiles, preserving their beauty and integrity for future generations.

2 Pack pH Test Strips, 160 Strips pH.1-14 Universal pH Test Paper Litmus Test Paper Soap Making Testing Strips for Water Wine Saliva Urine Soil Testing Pet Food and Diet pH Monitoring (Sealed Pack)
【Highly Accurate and Quick Readout】- 2 Pack (160pcs) HomEnjoy pH test strips is made of high-quality filter paper,…
As an affiliate, we earn on qualifying purchases.
As an affiliate, we earn on qualifying purchases.
Principles Behind Safe Spot‑Testing Techniques
To guarantee accurate assessment without damaging delicate antique textiles, safe spot-testing techniques rely on specific principles that prioritize preservation. These principles ensure minimal impact while evaluating dye stability. First, you focus on understanding chemical reactions, recognizing how dyes respond to testing agents without triggering harmful changes. Second, you emphasize controlled, small-area applications to prevent widespread damage. Third, you prioritize colorfastness testing methods that are gentle yet effective, avoiding harsh chemicals that could alter or weaken dyes. Using these principles, you can observe how dyes react under specific conditions, ensuring the textile’s integrity remains intact. Additionally, implementing proper quality assurance practices helps verify the safety and effectiveness of testing methods, further minimizing risk. Incorporating non-invasive techniques enhances the accuracy of results while safeguarding the textile’s surface. These testing protocols are designed to detect dye stability accurately without compromising the fabric’s condition, providing reliable insights into the textile’s preservation needs. Moreover, understanding regional resources and local expertise can inform the selection of appropriate testing environments and methods, ensuring optimal preservation strategies. Recognizing the importance of material compatibility can further prevent unintended reactions that may compromise the textile’s condition. This approach minimizes risk and provides reliable insights into dye stability, helping you preserve antique textiles for future generations.

Bed Maker’s Never Lift Your Mattress Wrap Around Bed Skirt, Classic Style, Low Maintenance Wrinkle Resistant Fabric, Traditional 14 Inch Drop Length, Queen, Mocha
Easy On & Off: This is not a traditional bed skirt! Our patented wrap-around design has no bulky…
As an affiliate, we earn on qualifying purchases.
As an affiliate, we earn on qualifying purchases.
Selecting Appropriate Testing Areas on Antique Fabrics
When choosing testing areas, look for hidden or less-visible sections of the fabric to prevent damage to the main display. Use small test spots that won’t be noticeable if the dye changes or the fabric reacts unexpectedly. This careful approach helps protect the antique’s integrity while ensuring accurate results. Additionally, selecting areas with less exposure to light can help assess dye stability more effectively. Ensuring the testing spot is in a protected environment minimizes external influences that could affect the outcome. Considering red team principles, such as creating a dedicated, distraction-free testing space, can further enhance concentration and accuracy during the testing process. Incorporating environmental controls like temperature and humidity can also improve the reliability of the test results.
Hidden Fabric Areas
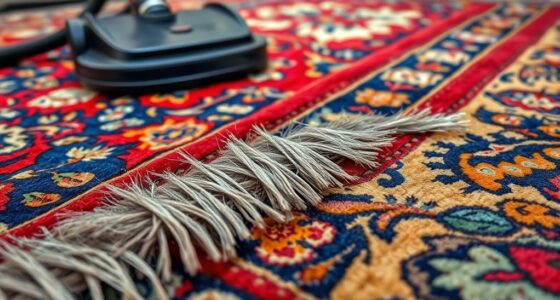
Choosing the right areas on an antique fabric for dye stability testing is essential to prevent unnecessary damage. Hidden fabric areas offer a safe spot to assess how the fabric’s dye will react without risking visible damage. Look for less exposed sections, such as under folds, behind seams, or inside hems. These areas often have less light exposure and are less likely to have experienced color fading over time. When selecting a hidden spot, imagine these features:
- Underneath decorative trims or embroidery
- Inside folds or pleats
- Behind layered fabric sections
Focusing on these less exposed fabric areas can help ensure accurate testing results while preserving the integrity of the antique piece. Recognizing dye stability in these sections can also provide valuable insights into the fabric’s overall preservation state. Additionally, understanding how automation in business impacts preservation efforts can inform better testing practices and conservation strategies.
Small Test Spots
Selecting small test spots on antique fabrics is crucial for accurately evaluating dye stability without causing noticeable damage. These tiny areas allow you to observe potential chemical reactions or color changes during testing, minimizing risk to the overall piece. Choose discreet, inconspicuous spots—such as along seams, hems, or fabric edges—to prevent visual disruption. Ensure the test area is clean and representative of the fabric’s overall condition. By carefully applying test solutions, you can perform a reliable colorfastness assessment, revealing how dyes respond to various chemicals or environmental factors. Small test spots give you a controlled environment to judge dye stability, making them an essential step in preserving the integrity and value of antique textiles.
discreet textile testing tools
As an affiliate, we earn on qualifying purchases.
As an affiliate, we earn on qualifying purchases.
Preparing for Safe Spot‑Testing: Tools and Materials Needed
To safely test your antique fabric, you’ll need specific tools and materials designed for gentle testing. Gather items like a soft brush, a dropper, and a mild testing solution to minimize any damage. Having everything ready guarantees you can perform the test accurately and securely.
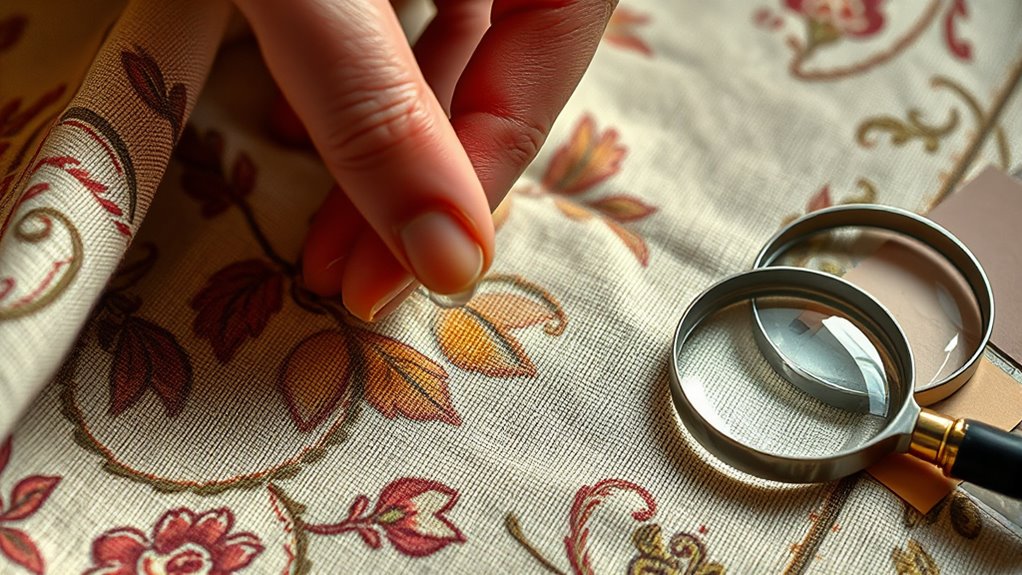
Tools for Spot-Testing
Before you begin spot-testing antique dyes, gather the essential tools and materials to guarantee safety and accuracy. You’ll need some key items to analyze dyes effectively. First, chemical reagents are vital for testing reactions and identifying dye types safely. Second, magnification tools like a jeweler’s loupe or a microscope help you observe subtle color changes and details that aren’t visible to the naked eye. Third, a clean, non-reactive surface or palette to apply small test samples ensures you don’t contaminate your materials. These tools allow for precise, safe testing without risking damage to the artifact. Properly preparing with these tools ensures you can assess dye stability confidently while maintaining safety and accuracy throughout the process.
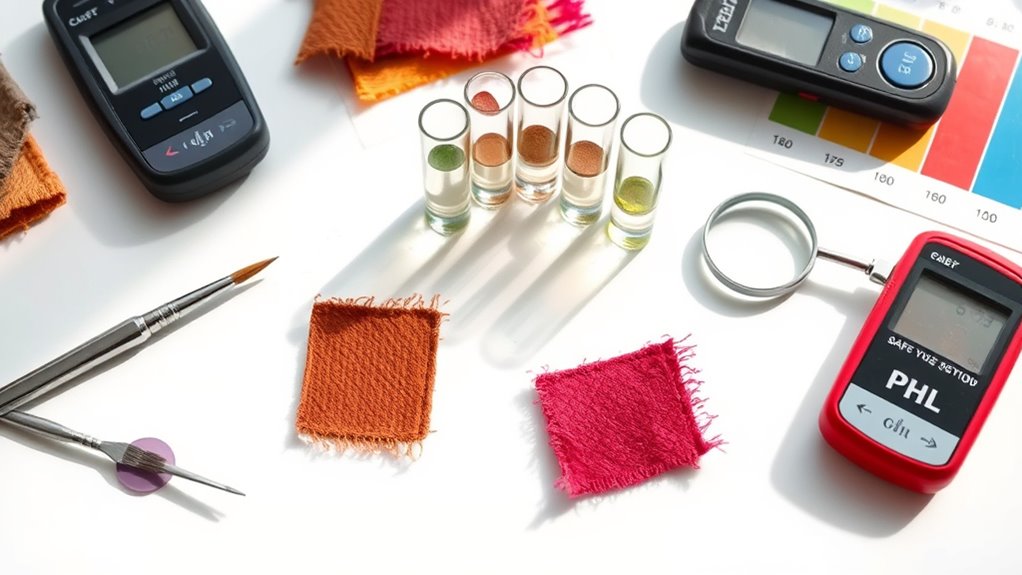
Materials for Safe Testing
Gathering the right materials guarantees your spot-testing is both safe and effective. You’ll need small, clean containers like glass or plastic test tubes to hold the dye samples. Use pH testing strips or a digital pH meter to monitor acidity, since natural dyes are sensitive to pH changes that can trigger chemical reactions. Always wear gloves and protective eyewear to prevent contact with any dyes or chemicals. Prepare distilled water for rinsing and diluting samples. Keep a notebook to record results and observations. Make certain your workspace is well-ventilated. Using proper tools and materials minimizes risks and helps you accurately assess the stability of antique dyes without causing damage. This careful preparation is essential for safely evaluating natural dyes’ chemical reactions over time.
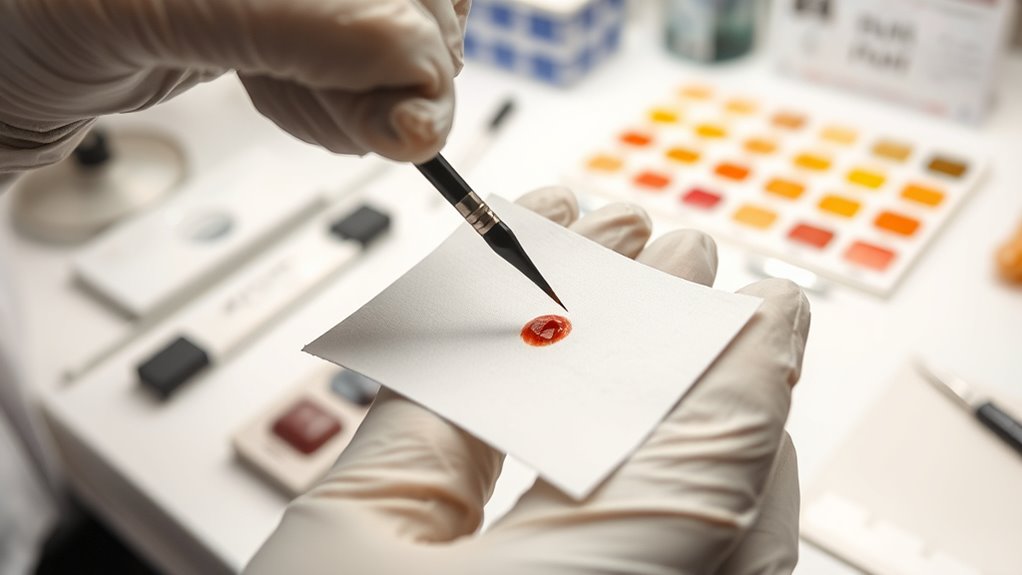
Step-by-Step Procedure for Conducting Spot Tests

Performing a spot test for antique dye stability involves a careful, step-by-step process to guarantee accurate results. First, select a hidden or inconspicuous area of the fabric for testing. Next, apply a small amount of a neutral solvent or solution recommended for colorfastness testing, using a dropper or cotton swab. Carefully observe the fabric as the solution interacts with the dye, noting any color change or bleeding. Conduct fabric analysis by comparing the tested area to an untreated section to identify potential dye instability. To ensure precision, keep in mind:
- Use consistent, minimal amounts of testing solution
- Test in a well-lit, controlled environment
- Record your observations meticulously
These steps help determine if the dye is stable without damaging or altering the antique fabric.
Interpreting Spot Test Results to Assess Dye Reaction
Interpreting spot test results accurately is essential for evaluating dye stability in antique fabrics. When analyzing your results, look for signs of chemical reactions, such as color changes or the emergence of new hues. A stable dye will typically show little to no change after testing, indicating resistance to fading or chemical interaction. In contrast, noticeable color fading suggests the dye is sensitive and may degrade over time. Be cautious of subtle shifts in hue, which could signal partial reactions or early signs of instability. Remember, consistent results across multiple tests strengthen your assessment. Proper interpretation helps determine whether the dye has maintained its integrity or if it’s vulnerable to deterioration, guiding you toward appropriate preservation methods for your antique textiles.
Common Challenges and How to Address Them During Testing
During spot testing of antique dyes, you may encounter several common challenges that can affect the accuracy of your results. One major issue is colorfastness, where dyes may fade or change with exposure, leading to misleading conclusions. Chemical reactions can also cause unexpected color shifts or deterioration, complicating interpretation. To address these challenges, be mindful of:
- Testing in controlled conditions to prevent environmental influence
- Using fresh, compatible reagents to avoid unintended reactions
- Recording initial dye appearance and reactions immediately for accurate comparison
Case Studies Demonstrating Effective Use of Spot‑Testing

Real-world case studies highlight how effective spot-testing can reveal dye stability and authenticity. For example, in one project, a textile from a historical dye source was tested with a safe spot-test, confirming the dye’s stability over centuries. Another case involved distinguishing between authentic ancient dyes and modern dye formulations used in reproductions. Spot-tests helped identify dyes derived from natural sources, such as indigo or madder, versus synthetic alternatives. These tests provided quick, reliable insights without damaging the fabric, allowing conservators to verify age and origin confidently. By applying safe spot-testing techniques, you can effectively assess dye stability, differentiate authentic historical dyes from modern formulations, and make informed conservation decisions based on tangible evidence.
Best Practices for Documenting and Preserving Test Outcomes

To guarantee the integrity and usefulness of your spot-test results, it’s essential to adopt robust documentation and preservation practices. Accurately record details such as test location, dye type, and environmental conditions to track color fastness and dye migration over time. Use clear photographs with a scale to visually document any changes. Keep detailed notebooks or digital logs to record observations, dates, and conditions. Label samples with unique identifiers and store them in stable, inert containers to prevent deterioration. Regularly review and update your records to identify patterns or shifts in dye stability. By maintaining thorough documentation, you ensure reproducibility, facilitate future comparisons, and support conservation decisions. Proper preservation safeguards your findings against deterioration, helping to protect the integrity of antique textiles.
Frequently Asked Questions
How Often Should Spot Tests Be Repeated on the Same Fabric?
You should repeat spot tests on the same fabric at regular testing intervals to guarantee ongoing fabric monitoring. This helps you detect any changes in dye stability early. How often you do this depends on the fabric’s age and exposure conditions, but generally, testing every few months is ideal. Consistent testing intervals allow you to catch issues early, preserving the integrity of the antique piece and preventing further damage.
Can Spot Testing Damage the Overall Integrity of the Antique Textile?
You might worry that spot testing could harm your antique textile, but careful testing actually helps prevent damage. While there’s a small risk of triggering chemical reactions, proper techniques minimize this. Spot testing is essential for textile preservation, ensuring you identify dye stability without compromising the fabric’s integrity. When done correctly, it’s a safe, effective way to safeguard your antique textile’s longevity and beauty.
What Are Alternative Methods if Dye Stability Cannot Be Confirmed?
If you can’t confirm dye stability, consider natural alternatives like using gentle cleaning methods or reversible treatments to minimize damage. You should also opt for laboratory analysis to accurately assess dye composition and stability, ensuring your antique textile’s preservation. These approaches help protect your artifact while providing reliable information, so you can make informed conservation decisions without risking further harm.
Are There Specific Environmental Conditions That Affect Dye Stability Testing?
Imagine a delicate fabric exposed to sunlight and humidity, where environmental factors like light, temperature, and moisture influence dye stability. These conditions can accelerate chemical reactions, fading or damaging dyes over time. You need to contemplate how environmental factors promote or inhibit dye deterioration, affecting your testing accuracy. Properly controlling these conditions ensures reliable results, helping you assess whether the dyes will withstand future environmental challenges.
How Do I Differentiate Between Fading and Dye Bleeding in Test Results?
You can differentiate between fading and dye bleeding by observing colorfastness indicators and dye migration signs. Fading appears as a uniform loss of color across the fabric, while dye bleeding shows localized dye smudges or spreading when exposed to moisture or light. Carefully compare test areas before and after exposure, noting any signs of dye migration. This helps you identify if the issue stems from fading or dye bleeding, ensuring proper preservation strategies.
Conclusion
Ironically, the very act of testing your antique textiles for dye stability is a delicate dance of trust and caution. While it might seem simple, a small spot test can save your treasures from irreversible damage—or cause unintended harm if done improperly. So, embrace the careful process, document everything, and remember: sometimes, the safest choice is knowing when to hold back and leave the dyes undisturbed. After all, preservation is the true art.